Problem: With the ribbon, I can only see one-seventh of the icons at any one time. I find that I spend a lot of time on the Data tab, but I annoyingly have to keep switching back to the Home tab. Does Microsoft really think this is better?
Strategy: Microsoft provided the Quick Access toolbar to address this problem. You can add your favorite icons to the Quick Access toolbar and then, because the Quick Access toolbar is always visible, you can invoke your most-used icons without having to switch ribbon tabs so frequently.
The Quick Access toolbar (QAT) starts out as a small bar with the icons Save, Undo, and Redo. It initially appears above the ribbon, above the File menu, as shown here.
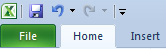
- The QAT starts with three icons.
If you right-click the Quick Access toolbar, you can choose to move it below the ribbon. This gets your most used icons closer to the grid and provides room for a few more icons.
A dropdown at the end of the QAT offers several popular commands that you can add to the toolbar.
If you have Excel 2010, add Open Recent File to your QAT. This shortcut icon was dropped in Excel 2013, although the Open icon comes close.
For twenty years, Ctrl+P would print your document. Starting in Excel 2010, Ctrl+P takes you to the Print panel in the Backstage view. You then have to click the Printer icon to actually print. Again, this is one more mouse click than previous versions. Add the new Quick Print icon to the QAT if the extra step annoys you.
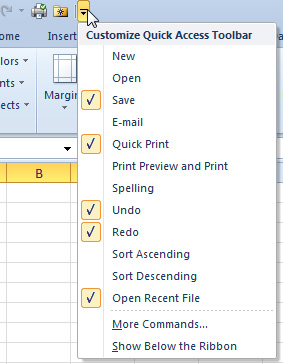
- Add these popular commands to the QAT.
When you find yourself using a ribbon icon frequently, you can right-click the icon and choose Add to Quick Access Toolbar, as shown below. This is the easiest way to customize the Quick Access toolbar.
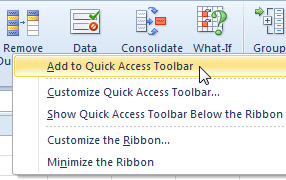
- Right-click a command and add to QAT
Gotcha: Some of the icons look similar to one another when moved to the Quick Access toolbar. For example, Goal Seek, Go To Special and Scenario Manager use a green crystal ball icon. Unless you are a fortune teller, hover over each icon to see its ToolTip and tell which is which.

- The green crystal ball is used for too many commands.
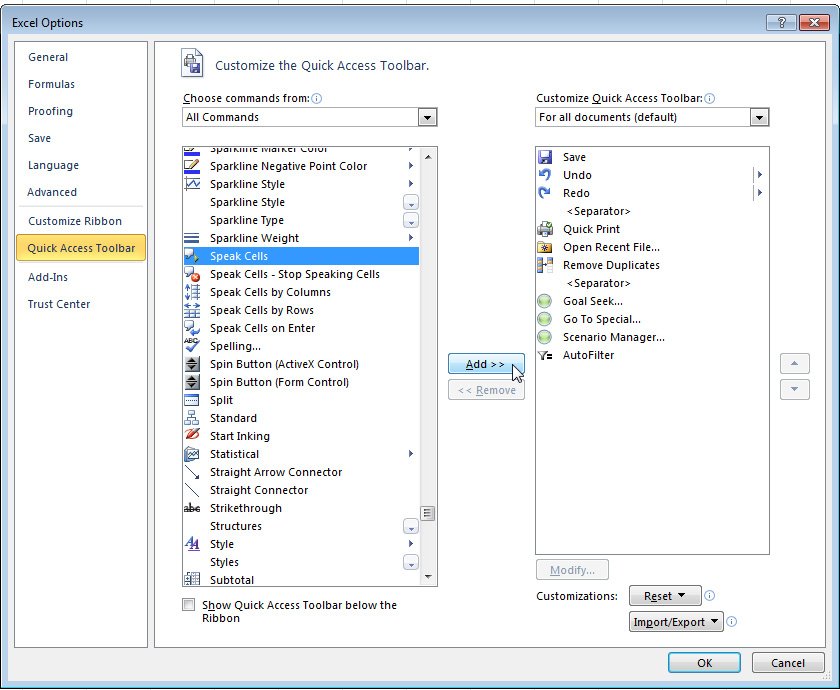
Additional Details: You can right-click the Quick Access toolbar and choose Customize Quick Access Toolbar to reach the full-featured dialog shown in Fig 42. The dialog offers a dropdown of categories on the left. Below this dropdown is a list of icons from the category. Here's how you use this dialog:
- You can select an icon on the left and click the Add button to add the icon to the Quick Access toolbar.
- You can select an icon on the right and click the Up or Down buttons to re-sequence the icons on the Quick Access toolbar.
- You can click the Reset button near the bottom to undo all your customizations and restore the Quick Access toolbar to the initial three buttons.
- You can use the top-right dropdown to say that certain icons should be assigned to the current workbook. Most Quick Access toolbar icons apply to every workbook. However, you can have 10 icons for every workbook and then add 3 additional icons for each specific workbook. The 10 global icons appear first, followed by the 3 local icons.
- You can organize your icons into logical groups and then add a separator between groups. To do this, you click the <Separator> item at the top of the left list and then click Add to add a vertical line between icons.
- You should pay particular attention to the category Commands Not in the Ribbon. If one of your favorite Excel 2003 or earlier commands is in this category, Microsoft completely left it out of the ribbon. The only way to access the command is by adding it to the Quick Access toolbar or a new group in a customized Ribbon.
- You can find all commands here.