Problem: Print settings appear in many different places in Excel. I am never sure if I should go to Page Setup, the Print dialog, or the Options button in the Print dialog.
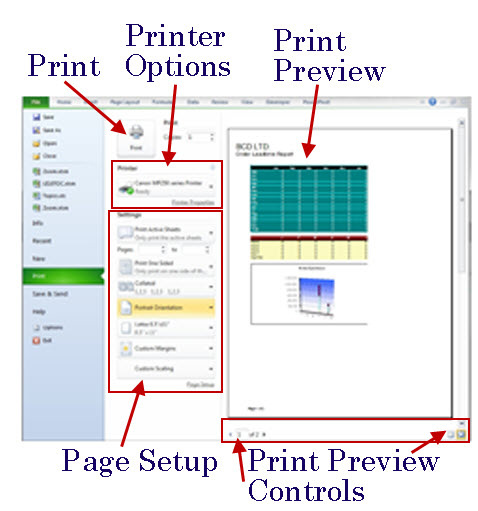
Strategy: Excel 2010's File menu introduces the new Print panel. Get there by using Ctrl+P or File, Print. This panel leverages all of the goodness of the new three-panel Backstage View.
As shown below, the new Print panel offers settings from the Print dialog, Printer Options dialog, Page Setup dialog, and the Print Preview.
Additional Details: There are a few tricks to the new Print pane. Look below the Print Preview on the right side of the screen. Little icons there give you all of the functionality that you might have used in the legacy print preview. The far right icon is Zoom. The icon to the left of zoom will draw the margins and column width markers in so you can adjust them in the preview. Move to the next page using the page control on the bottom left side of the Print Preview.
Gotcha: If you don't have a wide screen monitor, and if your document is in landscape mode, you may not like the print preview in this panel. Go back to the old Print Preview as discussed in the previous topic.
- Most of the print settings in one place.
Additional Details: The Settings section of the Print panel offers a new type of control. Normally, you might have a dropdown called Orientation. You would open the dropdown to see Portrait and Landscape and to see that one of those items is selected. The Office team created a new control for this panel that shows you the current selected item. When you open the dropdown, you see additional choices.
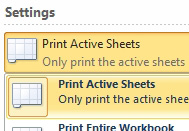
- The dropdown name shows you what is selected.