
Problem: In "How to Set Up Your Data for Easy Sorting and Subtotals," you say that headings should occupy only one row to allow for easy sorting. My manager requires that I format a report to have the heading "Prior Year" split, with "Prior" in one row and "Year" in a second row. How can I make my manager happy while also following the list format rules?
Strategy: This is a very real problem, where form meets function. The right thing to do in Excel is to have "Prior Year" in one cell. But some managers absolutely, positively want the formatting to be exactly as they specify. Luckily, there is a strategy that makes it possible to make the manager happy and to correctly set up the data set in Excel, too.
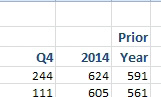
- Your manager wants this heading on two rows.
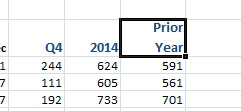
In cell X5, you type the word Prior. Then you hold down Alt while pressing Enter and type the word Year. The Alt+Enter combination adds a linefeed character in the cell. You can delete the old heading in X4 by moving the cell pointer there and pressing the Delete key.
- Use Alt+Enter to go to the next line.
Results: You have a single cell that contains two lines of text. The cell will work as a heading in pivot tables, subtotals, sorting, and so on.
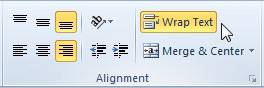
Additional Details: Using Alt+Enter automatically turns on the Wrap Text option for the cell. You could also turn on the Wrap Text option by choosing Home, Wrap Text icon.
- Wrap Text finally has an icon starting in Excel 2007.
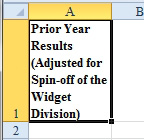
Turning on Wrap Text in this manner will probably work for a brief heading like "Prior Year." However, if you want to have control over a long heading, such as "Prior Year Results (Adjusted for Spin-off of the Widget Division)," then it is better to use Alt+Enter to specify exactly where the line break should occur. Wrap text uses a somewhat haphazard splitting of words.
- Excel decides where to break lines.
As you make this column wider, Excel changes the way the words are wrapped. It is frustrating to keep adjusting the column widths until you get the words to wrap correctly.
Gotcha: After resizing a cell with Wrap Text, you often end up with a row height that is too tall. To correct this, you select the cell and then choose Home, Format dropdown, Autofit Row Height.

- Adjusting column widths to change line breaks rarely works.
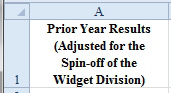
Using Alt+Enter gives you absolute control over where the heading breaks. To create the figure below, type Prior Year Results <Alt+Enter> (Adjusted for the <Alt+Enter> Spin-off of the <Alt+Enter> Widget Division). You can make the column wider and center it for the perfect-looking cell.
- Press Alt+Enter to wrap the text at logical points.